Fundamental Core Poses
Once you've gained a deeper understanding of your core anatomy, you’ll learn six fundamental poses that engage those key core muscles, which you can then practice on their own and by using our 13-minute video that weaves the poses together into one powerful sequence. You’ll finish the section with a quick quiz to test and reinforce your core anatomy and pose knowledge.
Plank Pose
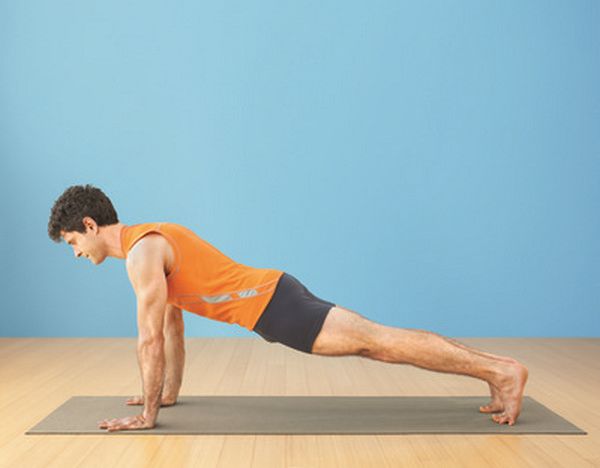
Start in Downward-Facing Dog Pose (Adho Mukha Svanasana). Then inhale and draw your torso forward until the arms are perpendicular to the floor and the shoulders are directly over the wrists, torso parallel to the floor, feet hip-width apart.
Press your outer arms inward and firm the bases of your index fingers into the floor. Firm your shoulder blades against your back, then spread them away from the spine. Also spread your collarbones away from the sternum.
Press your front thighs up toward the ceiling, but resist your tailbone toward the floor as you lengthen it toward the heels. Lift the base of the skull away from the back of the neck and look straight down at the floor, keeping the throat and eyes soft.
Slightly engage by pulling your wrists toward your feet and your feet toward your wrists. Notice now that the transversus abdominis is engaged, rectus abdominis is engaged, and your pelvic floor is slightly lifted. The spine extensors, erector spinae and multifidi, are also working.
Stay here for 30 seconds to 1 minute. Release to hands and knees.
Side Plank Pose
Sanskrit name: Vasisthasana
Translation: vasistha = most excellent, best, richest • asana = pose
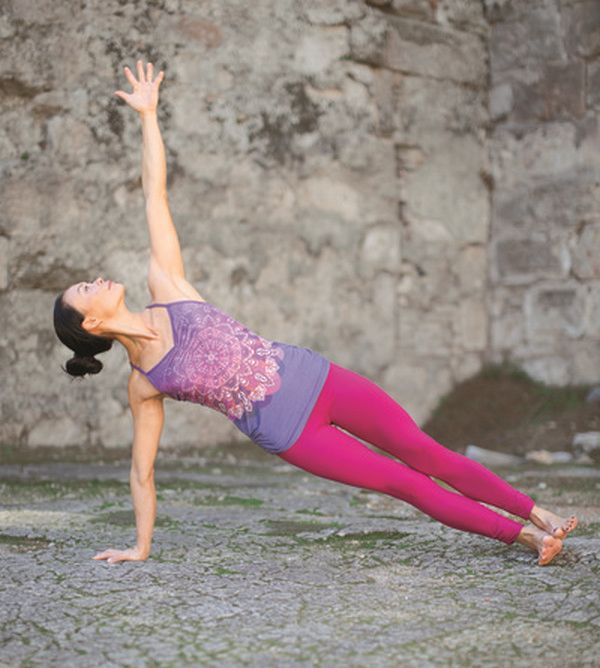
Starting in Plank Pose, bring your big toes to touch. Shift onto the outside edge of your right foot, and stack your left foot on top of the right. Now swing your left hand onto your left hip, turn your torso to the left as you do, and support the weight of your body on the outer right foot and right hand. You should feel your oblique muscles engaged especially on the side facing the floor.
Try to position the hand slightly in front of its shoulder, so the supporting arm is angled a bit relative to the floor. Straighten the arm by firming the triceps muscle, and press the base of the index finger firmly against the floor.
Firm the scapulas (shoulder blades) and sacrum (the triangular-shaped bone at the bottom of the spine) against the back torso. Strengthen the thighs, and press through the heels toward the floor. Align your entire body into one long diagonal line from the heels to the crown. Inhale, and as you exhale, lift your low belly up and in to feel your transversus and rectus abdominis engage.
Stay in this position for 15 to 30 seconds. Come back to Plank Pose, take a few breaths, and repeat to the left side for the same length of time. Then return to Plank Pose for a few more breaths, and finally release into Child's Pose (Balasana).
Revolved Forearm Plank
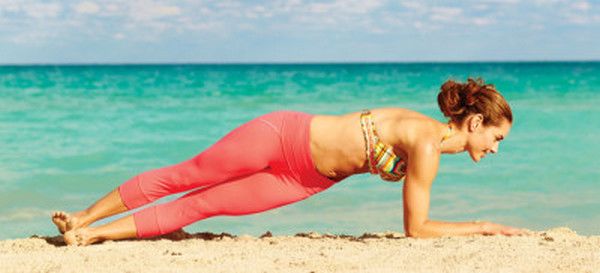
From hands and knees, place your forearms and palms on the floor. Make sure your elbows are under your shoulders and your upper arms are vertical.
Walk your feet back to plank, keeping your legs and pelvis in line with your shoulders. Gently draw your front ribs and lower belly back toward your spine. Dig your toe pads into the floor as you reach from your pelvis and thighs through your heels. Lift the back of your skull just enough to maintain the natural curve of your neck, and lengthen out through the crown of your head.
Keeping both forearms on the floor, bring your big toes to touch, then come to the little-toe side of your left foot, stacking your feet and legs in the middle of your mat in line with the space between your arms. Lean your weight evenly into both forearms, and reach through your feet while also lengthening through the crown of your head. Draw your low belly back and feel as though you are lifting the front of the pelvis up through the chest. Reach the back of your pelvis and tailbone toward your heels. Hold for 5 breaths.
At the bottom of an exhale breath, pull your low belly up and in and feel your pelvic floor slightly lift. Inhale return to center; exhale and switch sides. Repeat the entire sequence two more times with the same count. Exhale and release to hands and knees.
Half Boat Pose
Sanskrit name: Ardha Navasana
Translation: ardha = half • nava = boat • asana = pose
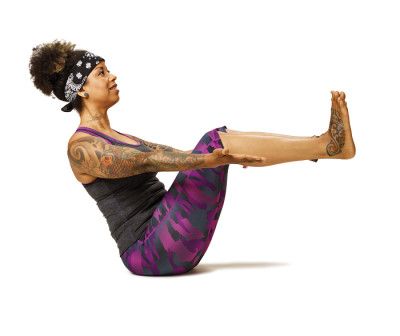
Sit on the floor with your legs bent, feet hip-width apart. Place your hands behind your knees, lengthen your spine, lift through the top of the sternum, and engage your low back and erector muscles.
Lean back slightly, making sure your back doesn’t round. Continue to lengthen the front of your torso between the pubis and top of the sternum. Sit on the “tripod” of your two sitting bones and tailbone.
Exhale, then engage the psoas to flex the hips towards the torso and lift your feet off the floor, so that the thighs are angled about 45-50 degrees relative to the floor and shins are parallel to the floor. Lengthen your tailbone into the floor and lift your pubis toward your navel. Inhale, then exhale, pulling your lower belly in.
Stretch your arms alongside the legs, parallel to each other and the floor. Spread the shoulder blades across your back and reach strongly out through the fingers.
While the lower belly should be firm, it shouldn’t get hard and thick or puff out so it looks like a loaf of bread—try to keep it relatively flat. Press the heads of the thigh bones toward the floor to help anchor the pose and lift the top sternum. Breathe easily. Tip the chin slightly toward the sternum so the base of the skull lifts lightly away from the back of the neck.
At first, stay in the pose for 10-20 seconds. Gradually increase the time of your stay to 1 minute. Release the legs with an exhalation and sit upright on an inhalation.
Full Boat Pose
Sanskrit name: Paripurna Navasana
Translation: paripurna = full, entire, complete • nava = boat • asana = pose
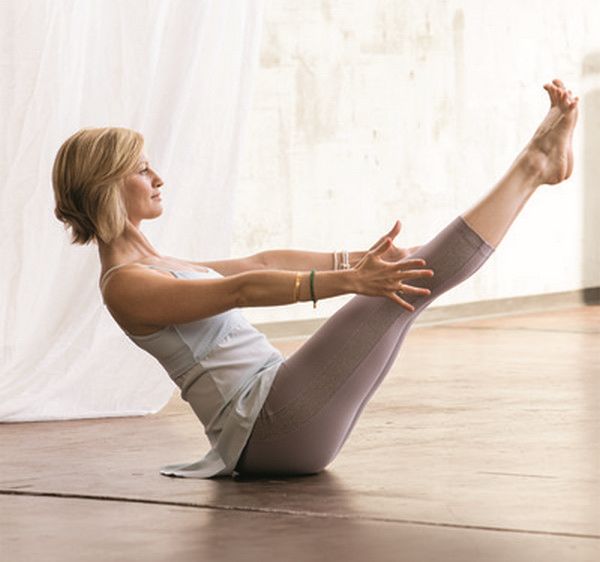
Sit on the floor with your legs bent, feet hip-width apart. Place your hands behind your knees, lengthen your spine, lift through the top of the sternum, and engage your low back and erector muscles.
Lean back slightly, making sure your back doesn’t round. Continue to lengthen the front of your torso between the pubis and top sternum. Sit on the “tripod” of your two sitting bones and tailbone.
Exhale and bend your knees, then lift your feet off the floor, so that the thighs are angled about 45-50 degrees relative to the floor. Lengthen your tailbone into the floor and lift your pubis toward your navel. Slowly straighten your knees, raising the tips of your toes slightly above the level of your eyes. Your psoas is holding your legs in the “V” shape relative to your torso, where the erectors and transversus and rectus abdominis are working to support the lower back by keeping a long spine and strong belly.
Stretch your arms alongside the legs, parallel to each other and the floor. Spread the shoulder blades across your back and reach strongly out through the fingers.
Keep the low belly relatively flat. Press the heads of the thigh bones toward the floor to help anchor the pose and lift the top sternum. Breathe easily. Tip the chin slightly toward the sternum so the base of the skull lifts lightly away from the back of the neck.
At first stay in the pose for 10-20 seconds; if you can't without rounding your back, return to Half Boat Pose. Gradually increase the time of your stay to 1 minute. Release the legs with an exhalation and sit upright on an inhalation.
Alternate Leg Lifts
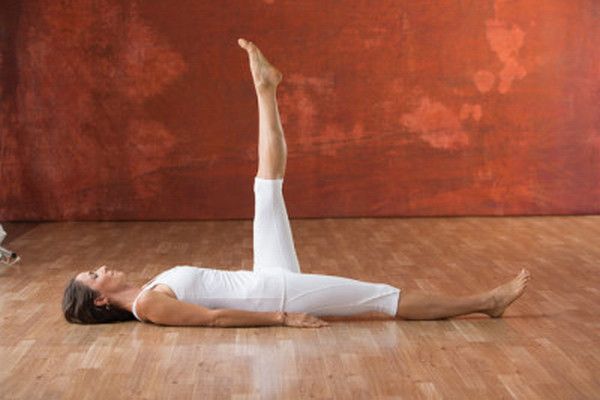
Lie on your back, with your legs fully extended along the floor, arms along your sides, palms down. Or, for extra stability, hold onto the sides of your mat.
Inhale slowly as you pull the low belly in and lift your left leg to 90 degrees, trying to maintain a slight lumbar curve. Exhale, feeling your belly pull in more.
Inhale, then exhale and start to lower your left leg toward the ground, keeping your lower belly pulled in and lifting your pelvic floor. Stretch your leg long from the top of your head through your heel.
Inhale and lift your right leg up; exhale, pulling your low belly in as you lower your right leg, stretching it long. Transversus abdominis engages on the exhale to stabilize the lowering leg. Psoas works to bring the leg back up toward the torso.
Alternate left and right legs 3 times. If your lower back hurts, place your hands underneath your sacrum for support.
Put it into practice
This yoga video incorporates all six fundamental core poses, plus some transitions and counter poses, into one smooth, easy-to-follow sequence. Follow along on your own mat to practice the poses you just learned, get a better feel for and understanding of your essential core muscles, and start building core strength and ability. Before you start, take a few slow breaths to settle in, then warm up with 2-3 rounds of Sun Salutations (see Resources).
Wrap Up
In this section, you learned about the core musculature that’s most vital to building and supporting a strong, stable core. You also learned how to do six basic yoga poses that enable you to isolate, engage, and strengthen each of those key muscles.
Practice the foundational poses individually when you have a few minutes, or by mindfully inserting them into your regular yoga practice. Or, for more sustained core work, practice the full video sequence. Either way, aim to practice every day for the next week.
